
Introduction to Cheesy Delight 12 Inch Pizza
Homemade pizza has surged in popularity over the years, captivating food lovers with its irresistible aroma and the satisfaction of crafting a delicious meal from scratch. There’s something uniquely rewarding about rolling out your own dough, layering on your favorite toppings, and watching as it transforms in the oven into a bubbly, cheesy masterpiece. Among the myriad of pizza recipes available, the Cheesy Delight 12 Inch Pizza stands out. This recipe showcases the beauty of simplicity, allowing the flavors of fresh ingredients to shine through while still being adaptable to suit individual tastes.
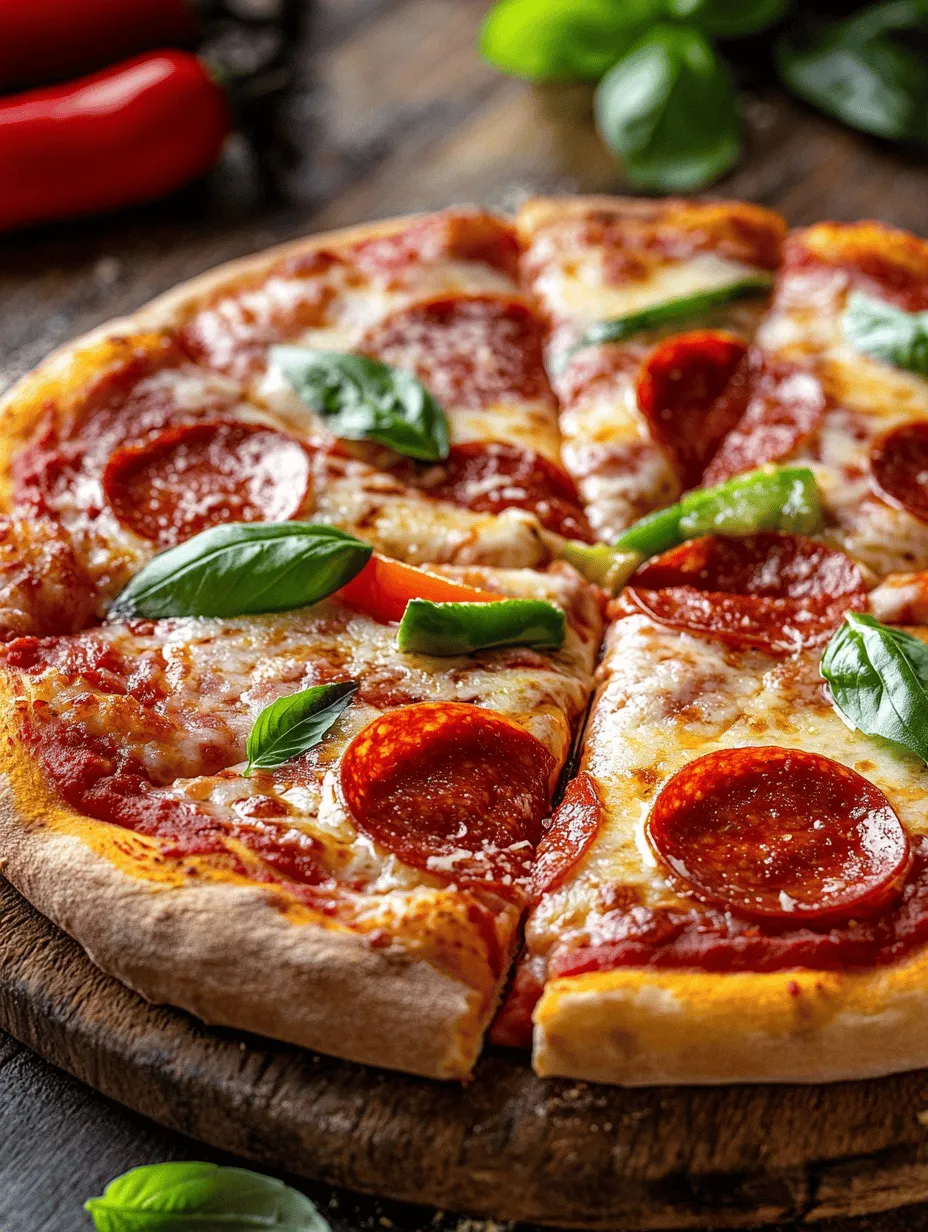
The Cheesy Delight Pizza is an excellent introduction to the world of homemade pizzas, emphasizing its delightful cheese blend and the ease with which it can be prepared. Whether you’re a seasoned cook or a kitchen novice, this recipe is straightforward enough for anyone to tackle. One of the best features of this pizza is its versatility; you can customize it with a variety of toppings to cater to your preferences or dietary needs. From pepperoni and olives to artichokes and spinach, the choices are endless, making this pizza a perfect canvas for culinary creativity.
Making pizza from scratch offers unparalleled flavor and freshness that store-bought alternatives simply cannot match. The act of preparing your own dough and sauce allows you to control the ingredients, ensuring that you’re creating a wholesome meal filled with quality components. This process not only enhances the overall taste of the pizza but also enriches the cooking experience, making it a delightful activity to share with family and friends.
Understanding the Ingredients
Before diving into the preparation of the Cheesy Delight Pizza, it’s essential to familiarize yourself with the key ingredients that will come together to create the perfect pie. A successful pizza starts with a well-crafted dough, which serves as the sturdy foundation for all the delicious toppings that will follow.
Essential Ingredients for the Dough
All-Purpose Flour: This versatile flour is crucial in creating a sturdy base for your pizza. Its moderate protein content strikes a balance between tenderness and chewiness, allowing the crust to rise nicely while still providing the ideal texture. When selecting flour, choose a high-quality all-purpose flour for the best results, as it will significantly impact the dough’s performance.
Active Dry Yeast: This ingredient is responsible for leavening the dough, creating the light and airy texture that characterizes a great pizza crust. When activated, yeast ferments the sugars in the dough, producing carbon dioxide gas that causes the dough to rise. Understanding how to properly activate the yeast is crucial for achieving the desired pizza crust texture.
Warm Water: The role of warm water in the dough preparation process cannot be underestimated. It is used to dissolve the yeast, activating it and allowing it to work its magic. The warmth of the water is vital; if it’s too hot, it can kill the yeast, while water that is too cold will not effectively activate it. Aim for a temperature between 100°F and 110°F (37°C to 43°C) for optimal results.
Sugar: A small amount of sugar is added to the dough to enhance yeast activity and contribute to the overall flavor. Sugar acts as food for the yeast, promoting fermentation and helping to achieve a golden-brown crust once baked. It also balances the savory elements of the dough, creating a well-rounded taste.
Salt: Salt is another crucial component that helps to balance the flavors in the dough. Beyond flavor enhancement, salt strengthens the gluten structure, contributing to the overall elasticity and chewiness of the crust. Be careful not to add too much salt, as it can inhibit yeast activity.
Olive Oil: Incorporating olive oil into the dough adds moisture and richness, resulting in a tender crust with a delightful flavor. The oil also aids in browning, giving your pizza a beautiful golden color. Use high-quality extra virgin olive oil for the best taste.
Discussion on Pizza Sauce Options
Once you’ve mastered the dough, it’s essential to consider the sauce that will elevate your Cheesy Delight Pizza. The sauce can vary significantly in flavor and texture, which can dramatically influence the overall taste of the pizza.
Homemade vs. Store-Bought: There are pros and cons to both homemade and store-bought pizza sauces. Homemade sauces allow you to control the ingredients, ensuring freshness and flavor, and can be tailored to your preferences. Simple recipes often include crushed tomatoes, garlic, herbs, and a splash of olive oil. On the other hand, store-bought sauces can be convenient and save time, with many brands offering high-quality options. However, they may contain preservatives or added sugars that you might want to avoid.
Cheese Selections
The star of the Cheesy Delight Pizza is undoubtedly the cheese. Choosing the right cheese or combination of cheeses will enhance the texture and flavor of your pizza.
Benefits of Using Mozzarella and Parmesan: Mozzarella is the classic pizza cheese, renowned for its exceptional melting properties and stretchiness. It provides a creamy texture that complements the dough beautifully. For an extra layer of flavor, consider adding Parmesan cheese, which brings a sharp, nutty note to the pizza. This combination creates a delightful balance, ensuring your Cheesy Delight Pizza is as delicious as it is satisfying.
Step-by-Step Guide to Making Cheesy Delight Pizza
With an understanding of the ingredients under your belt, it’s time to dive into the step-by-step process of creating your Cheesy Delight Pizza. Let’s start with preparing the dough, which is the foundation of this culinary endeavor.
Preparing the Dough
The first step in making your Cheesy Delight Pizza is preparing the dough. This process begins with activating the yeast, which is crucial for achieving a light and airy crust.
Yeast Activation Process
1. Warm Water: Begin by measuring out the warm water in a bowl. Ensure that the water temperature is between 100°F and 110°F (37°C to 43°C).
2. Add Yeast: Sprinkle the active dry yeast over the surface of the water. Allow it to sit undisturbed for about 5 to 10 minutes. During this time, you should see the yeast begin to foam and bubble, indicating that it’s been successfully activated.
3. Incorporate Sugar: Add the sugar to the yeast mixture. Stir gently to combine, and let it sit for an additional minute, allowing the sugar to dissolve and further feed the yeast.
Importance of Dough Consistency and Texture
Once your yeast is activated, it’s time to start mixing the dough. In a large mixing bowl, combine the all-purpose flour and salt. Make a well in the center, and pour in the yeast mixture along with the olive oil.
1. Mix the Ingredients: Using a wooden spoon or your hands, mix the ingredients until they start to come together. The dough should be slightly sticky but not overly wet. If it’s too sticky, gradually add more flour, a tablespoon at a time, until the desired consistency is achieved.
2. Kneading the Dough: Transfer the dough onto a lightly floured surface. Knead the dough for about 8 to 10 minutes, folding and pressing it until it becomes smooth and elastic. This process is crucial for developing the gluten, which gives the dough its structure and chewiness.
3. Dough Texture: During kneading, the dough should feel soft and pliable, forming a ball that bounces back when pressed gently. If the dough feels too dry, add a little more warm water; if it’s too wet, sprinkle in a bit more flour.
First Rise
After kneading, it’s time to let the dough rise. This step is essential in developing the texture and flavor of your pizza crust.
1. Prepare for Rising: Lightly oil a large bowl and place the kneaded dough inside, turning it to coat all sides with oil. This prevents the dough from drying out as it rises.
2. Cover the Dough: Cover the bowl with a clean kitchen towel or plastic wrap. Place it in a warm, draft-free area to rise. Ideal conditions for rising are temperatures around 75°F to 85°F (24°C to 29°C).
3. Rising Time: Allow the dough to rise for about 1 to 1.5 hours or until it has doubled in size. This fermentation process not only leavens the dough but also enhances its flavor profile, creating a rich, delicious base for your Cheesy Delight Pizza.
As the dough rises, you’ll have time to prepare your pizza sauce and gather your cheese and toppings, ensuring everything is ready for the assembly stage. The anticipation of creating your masterpiece will build as the aroma of fresh dough fills your kitchen, setting the stage for an unforgettable dining experience.
Signs that the Dough Has Risen Sufficiently
After allowing your pizza dough to rise, it’s crucial to check for signs that it has reached its full potential. The ideal dough should have doubled in size and feel airy and light. Gently poke the dough with a finger; if the indentation remains, it’s a sign that the yeast has done its job. Additionally, the dough should spring back slowly, indicating that the gluten structure is developed enough to hold its shape. If your dough meets these criteria, you’re ready to prep for the oven!
Prepping for the Oven
Preheating the Oven
Before you dive into shaping your pizza, preheat your oven to its highest setting, usually around 475°F to 500°F (245°C to 260°C). This high temperature is crucial for achieving that crispy crust that everyone loves. A hot oven ensures that the dough cooks quickly, allowing for a beautifully golden exterior while keeping the inside soft and chewy.
Importance of a Hot Oven for Achieving a Crispy Crust
A hot oven not only cooks the pizza quickly but also enhances the Maillard reaction, which gives your crust its delicious flavor and appealing color. If the oven is not hot enough, the dough may become soggy and fail to rise properly, resulting in a less-than-ideal pizza experience. For the best results, consider using a pizza stone or a steel, which retains heat better than a regular baking sheet.
Using a Pizza Stone vs. Baking Sheet: Benefits of Each Approach
When it comes to cooking your pizza, you have two popular options: a pizza stone or a baking sheet.
– Pizza Stone: A pizza stone absorbs moisture and distributes heat evenly, leading to a perfectly crispy crust. It’s ideal for mimicking the conditions of a traditional pizza oven. Preheat the stone in the oven for at least 30 minutes before placing the pizza on it.
– Baking Sheet: A good alternative for those without a pizza stone, a baking sheet is easy to use and can still yield great results. The key is to preheat the sheet as well, ensuring the bottom of the crust starts cooking immediately upon contact.
Shaping the Pizza
Rolling Out the Dough to the Perfect Thickness
Once your dough is ready, it’s time to shape it into a pizza. Lightly flour your work surface to prevent sticking, then place your dough ball in the center. Using a rolling pin, roll out the dough into a circle about 12 inches in diameter. Aim for a thickness of about ¼ inch for a traditional crust. If you prefer a thicker crust, adjust accordingly, but be mindful that a thicker crust may require a longer baking time.
Tips for Transferring the Shaped Dough to the Baking Surface
Transferring your shaped pizza dough can be tricky, but a few tips can simplify the process:
1. Use Parchment Paper: For easy transfer, roll out your dough on a piece of parchment paper. Once shaped, you can easily slide the parchment onto your baking surface or pizza stone.
2. Floured Peel: If using a pizza stone, consider using a pizza peel dusted with flour or cornmeal. This will allow the dough to slide off easily when you’re ready to bake.
3. Careful Handling: If you need to lift the dough, use your hands or a spatula to gently lift the edges, avoiding tearing the dough.
Building Your Pizza
Adding Sauce and Cheese
With the dough properly shaped, it’s now time to build your pizza.
Techniques for Spreading Sauce Evenly
Start by spreading your pizza sauce over the dough, leaving about a half-inch border around the edges for the crust. Use the back of a spoon or a ladle to spread the sauce evenly, ensuring an even distribution. This helps prevent sogginess in the center while allowing the flavors to shine through.
Importance of Layering Cheese for Optimal Melt and Flavor
Once your sauce is laid down, it’s time to add cheese. Start with a generous layer of shredded mozzarella cheese, which is known for its excellent melting properties. For added flavor, consider mixing in other cheeses such as provolone or parmesan. Layering your cheese evenly helps ensure that every bite is cheesy and delicious.
Exploring Optional Toppings
Now comes the fun part—adding your favorite toppings!
– Popular Toppings: Consider classic options like pepperoni, mushrooms, bell peppers, or olives. These toppings are not only tasty but also add color and texture to your pizza.
– Balancing Flavors and Textures with Topping Choices: When choosing toppings, think about flavor balance. For instance, if you opt for spicy sausage, you might want to include sweet bell peppers to offset the heat. Experimenting with different combinations can lead to delightful discoveries!
Baking the Pizza
Baking Techniques
With your pizza fully assembled, it’s time to bake!
Ideal Baking Times and Temperatures for Achieving the Perfect Crust
Place your assembled pizza in the preheated oven. If using a pizza stone, slide it onto the stone using your peel. Bake for about 10-15 minutes, keeping a close eye on it. If you’re using a baking sheet, the time may be slightly longer. The goal is to achieve a bubbling, golden crust.
Recognizing When the Pizza is Done
Your pizza is done when the cheese is melted and bubbly, and the crust is golden brown. If you’re unsure, you can gently lift one edge of the pizza with a spatula to check the color of the bottom crust. A perfectly baked pizza should have a crisp, golden bottom.
Cooling and Serving
Importance of Letting the Pizza Cool Before Slicing
After baking, remove the pizza from the oven and let it cool for a few minutes. This step is essential because it allows the cheese to set slightly, making slicing easier and preventing a messy first cut.
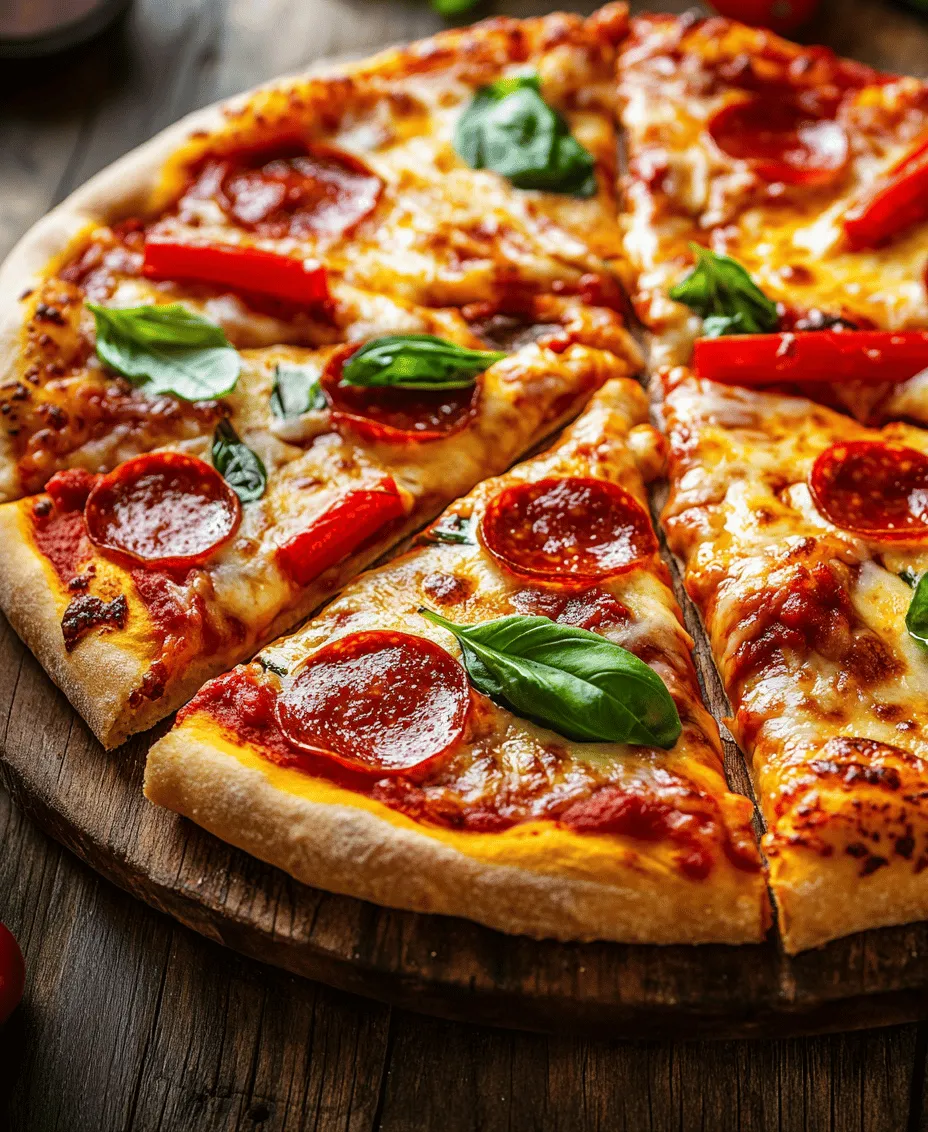
Recommendations for Garnishing with Fresh Herbs
For a finishing touch, consider garnishing your pizza with fresh herbs like basil or oregano. Not only do they add a burst of flavor, but they also enhance the visual appeal of your pizza.
Conclusion: Enjoying Your Homemade Cheesy Delight Pizza
Making your own Cheesy Delight Pizza from scratch is not just a cooking task; it’s a rewarding experience. From kneading the dough to choosing your favorite toppings, every step leads to a delicious reward. The joy of shaping dough and watching it rise, combined with the aroma of baking pizza, creates a unique culinary experience that is hard to match.
Don’t be afraid to experiment with different toppings and flavors. The beauty of homemade pizza is its versatility—there’s a world of ingredients to explore! Whether you’re enjoying a cozy night in or sharing slices with family and friends, this pizza recipe is sure to bring smiles. So roll up your sleeves, gather your ingredients, and start crafting your very own Cheesy Delight Pizza today!