
Introduction
If you’re on the lookout for a fun and delicious appetizer that will impress your guests or simply elevate your family movie night, look no further than cheesy pizza dough balls served with marinara dip. This delightful recipe combines the universally loved flavors of pizza into a handheld, bite-sized treat that is sure to please both kids and adults alike. With a crispy exterior and a gooey, cheesy center, these dough balls bring a unique twist to traditional pizza, making them an irresistibly tasty option for any occasion.
Cheese-filled snacks have been a staple at parties and gatherings for decades, and for good reason. They are versatile, easy to prepare, and offer a comforting indulgence that everyone can enjoy. Whether you’re hosting a birthday party, a game night, or just looking for a delicious snack to enjoy while relaxing at home, cheesy pizza dough balls are a fantastic choice. Pair them with homemade marinara sauce for dipping, and you have a crowd-pleaser that is hard to resist.
In this article, we will dive into the art of making cheesy pizza dough balls from scratch. We will explore the essential ingredients that contribute to their flavor and texture, as well as provide a detailed step-by-step guide to preparing this delightful snack. Let’s get started on this cheesy adventure!
Understanding the Ingredients
Before we jump into the preparation of our cheesy pizza dough balls, it’s essential to understand the key ingredients that will make this recipe a success. Each element plays a crucial role in creating the perfect dough and ensuring that the flavors blend harmoniously.
All-Purpose Flour
All-purpose flour serves as the foundation of our pizza dough. Its balanced protein content makes it versatile enough for various baking applications, including pizza and bread. When combined with water and yeast, all-purpose flour helps create a chewy yet tender texture that is ideal for dough balls. It’s essential to measure the flour accurately and consider factors like humidity and altitude, which can affect the amount of water needed for the dough.
Instant Yeast
Instant yeast is a vital ingredient in our recipe, responsible for leavening the dough and giving it that delightful rise. Unlike active dry yeast, instant yeast can be mixed directly with dry ingredients, which saves time in the preparation process. As the yeast ferments, it produces carbon dioxide, creating air pockets in the dough and resulting in a light and airy texture. This is what makes our dough balls fluffy on the inside while maintaining a crisp outer layer.
Salt
Salt is often overlooked in baking, but it plays a critical role in enhancing the dough’s flavor and controlling yeast activity. It acts as a flavor enhancer, bringing out the natural taste of the ingredients. Additionally, salt strengthens the dough by tightening the gluten network, which is vital for achieving the right texture. Too much salt can inhibit yeast growth, so it’s important to follow the recommended measurements in the recipe.
Olive Oil
Adding olive oil to the dough not only enriches the flavor but also contributes to its overall texture. The oil coats the flour particles, making the dough softer and preventing it from becoming too tough during kneading. It also helps keep the dough moist as it rises, resulting in a tender, flavorful final product. Plus, the subtle fruity notes of olive oil complement the cheesy filling beautifully.
Warm Water
Warm water is essential for activating the yeast. The ideal temperature for yeast activation is between 100°F to 110°F (37°C to 43°C). If the water is too hot, it can kill the yeast, while water that is too cold may slow down the fermentation process. When mixed with the other ingredients, warm water helps create a cohesive dough, allowing it to rise effectively.
Cheese (Mozzarella and Parmesan)
Cheese is the star of our cheesy pizza dough balls, and for this recipe, we’ll be using a combination of mozzarella and Parmesan. Mozzarella cheese is known for its excellent melting properties, creating that gooey, stretchy texture we crave in cheesy snacks. Its mild flavor allows it to blend seamlessly with other ingredients. On the other hand, Parmesan adds a nutty, salty depth that elevates the overall flavor profile. Together, these cheeses create a deliciously cheesy filling that is hard to resist.
Garlic Powder and Italian Herbs
To enhance the flavor of our cheesy dough balls, we’ll be incorporating garlic powder and a mix of Italian herbs. Garlic powder adds a savory, aromatic touch that complements the cheese perfectly, while Italian herbs—such as oregano, basil, and thyme—infuse the dough with a classic Italian flavor. These seasonings create a delightful aroma during baking and make the cheesy balls even more appetizing.
Marinara Sauce
No cheesy pizza dough ball would be complete without a dipping sauce, and marinara is the perfect choice. This classic Italian sauce is made from tomatoes, garlic, herbs, and olive oil, creating a rich and tangy counterpart to the cheesy goodness of our dough balls. A brief history of marinara reveals its roots in Italian cuisine, where it was traditionally used with pasta. Today, marinara sauce has evolved and is enjoyed as a dip for various snacks, making it an ideal pairing for our cheesy pizza dough balls.
Step-by-Step Guide to Making Cheesy Pizza Dough Balls
Now that we have a solid understanding of the ingredients, let’s dive into the step-by-step process of making cheesy pizza dough balls. This hands-on approach will guide you through each stage, ensuring that you achieve the best results.
Preparation of the Dough
1. Mixing the Dry Ingredients: Start by combining the all-purpose flour, instant yeast, salt, garlic powder, and Italian herbs in a large mixing bowl. Mixing the dry ingredients together before adding the wet ones helps distribute the yeast and salt evenly throughout the flour, ensuring consistent flavor and texture.
2. Adding the Wet Ingredients: Create a well in the center of the dry mixture and pour in the warm water and olive oil. Using a fork or a wooden spoon, gradually mix the dry ingredients into the wet ones. Continue until the mixture begins to come together into a shaggy dough.
3. Achieving the Right Consistency: The goal is to create a dough that is slightly sticky but not overly wet. If the dough feels too dry, add a teaspoon of warm water at a time until it reaches the right consistency. Conversely, if it’s too sticky, sprinkle in a little more flour until it becomes manageable.
Kneading Techniques
Kneading is a crucial step in developing the gluten structure of the dough, which gives it strength and elasticity. Here’s how to knead effectively:
1. Kneading by Hand: Transfer the dough to a lightly floured surface. Using the heel of your hand, push the dough away from you. Fold it back over itself and give it a quarter turn. Repeat this process for about 8 to 10 minutes. The dough should become smooth and elastic, and it should spring back when pressed with your finger.
2. Signs of Well-Kneaded Dough: You’ll know the dough is kneaded adequately when it’s smooth and elastic to the touch. It should also pass the “windowpane test”: take a small piece of dough and stretch it between your fingers. If it stretches thinly without tearing, you have successfully developed the gluten structure.
With the dough prepared and kneaded to perfection, you’re well on your way to creating delicious cheesy pizza dough balls. Stay tuned for the next part, where we’ll explore how to shape the dough balls, fill them with cheese, and bake them to golden perfection!
The Rising Process
Allowing your dough to rise is a crucial step in creating the perfect cheesy pizza dough balls. The rising process, also known as fermentation, enables the yeast to produce carbon dioxide, which causes the dough to expand and develop a light, airy texture. Skipping this step or rushing through it can result in dense, chewy dough balls that lack the desired fluffiness.
Optimal Conditions for Dough Rising
To ensure your dough rises effectively, consider the following tips for creating the perfect environment at home:
1. Warm Environment: Yeast thrives in warmth. The ideal temperature for rising dough is between 75°F and 85°F (24°C to 29°C). If your kitchen is cool, you can turn on your oven to the lowest setting for a few minutes, then turn it off and place the dough inside to rise.
2. Cover the Dough: To prevent the surface of the dough from drying out, cover it with a damp cloth or plastic wrap. This helps maintain moisture and creates a humid environment, which is perfect for fermentation.
3. Humidity Level: If your home is dry, consider placing a small bowl of hot water in the oven with the dough. The steam will create humidity, promoting a better rise.
4. Time: Patience is key when it comes to letting your dough rise. Generally, the dough should rise for about 1 to 1.5 hours or until it has doubled in size. If you have the time, allowing it to rise slowly overnight in the refrigerator can enhance the flavor through a longer fermentation process.
Shaping the Dough Balls
Once your dough has risen beautifully, it’s time to shape it into individual dough balls. Here’s a step-by-step guide to ensure a successful transformation:
1. Prepare Your Workspace: Lightly flour your countertop to prevent sticking.
2. Divide the Dough: After the dough has doubled in size, gently punch it down to release the air. Divide the dough into equal portions, typically about 2 ounces each. This will yield about 12-16 dough balls, depending on your preference.
3. Shape the Balls:
– Take one piece of dough and flatten it slightly in your palm.
– Place a small cube of cheese in the center (mozzarella works best for its meltiness).
– Gently pull the edges of the dough over the cheese, pinching them together to seal it inside.
– Roll the dough between your hands to form a smooth ball.
4. Sealing the Cheese: To avoid cheese leakage during baking, ensure that the seams are tightly sealed. You can also give each ball a final roll on the countertop to make sure the cheese is securely encased.
Seasoning for Maximum Flavor
Before you pop your dough balls into the oven, it’s essential to season them for maximum flavor. Here are some key points:
– Salt: Adding a pinch of salt to the dough during the mixing stage enhances the overall flavor. Salt can also be sprinkled on top of the dough balls before baking for an added crunch.
– Garlic Powder or Herbs: Consider incorporating garlic powder, Italian herbs (like oregano and basil), or even red pepper flakes into the dough for a flavor boost. Sprinkle some on top of the dough balls before baking for an aromatic finish.
– Additional Toppings: Experiment with toppings before baking. Some delicious options include:
– Grated Parmesan cheese for extra richness.
– Sesame seeds for a nutty crunch.
– Everything bagel seasoning for a flavorful twist.
Baking the Dough Balls
Now that your dough balls are shaped and seasoned, it’s time to bake them to golden perfection. Follow these tips for the best results:
1. Oven Settings: Preheat your oven to 400°F (200°C). A hot oven is essential for achieving that perfect crispy exterior while maintaining a soft, cheesy interior.
2. Baking Time: Place the dough balls on a parchment-lined baking sheet, ensuring they are spaced a few inches apart to allow for expansion. Bake for about 15-20 minutes or until they are golden brown.
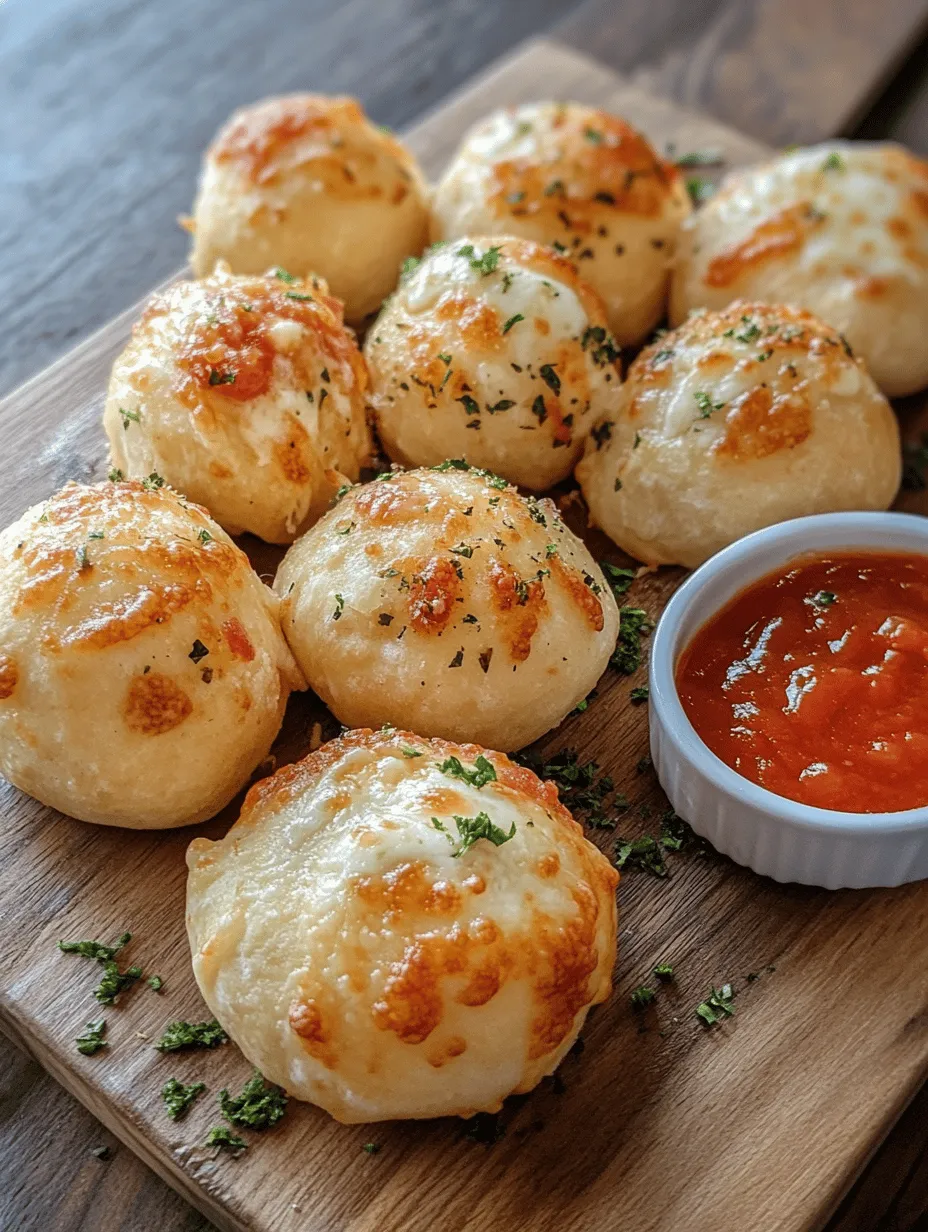
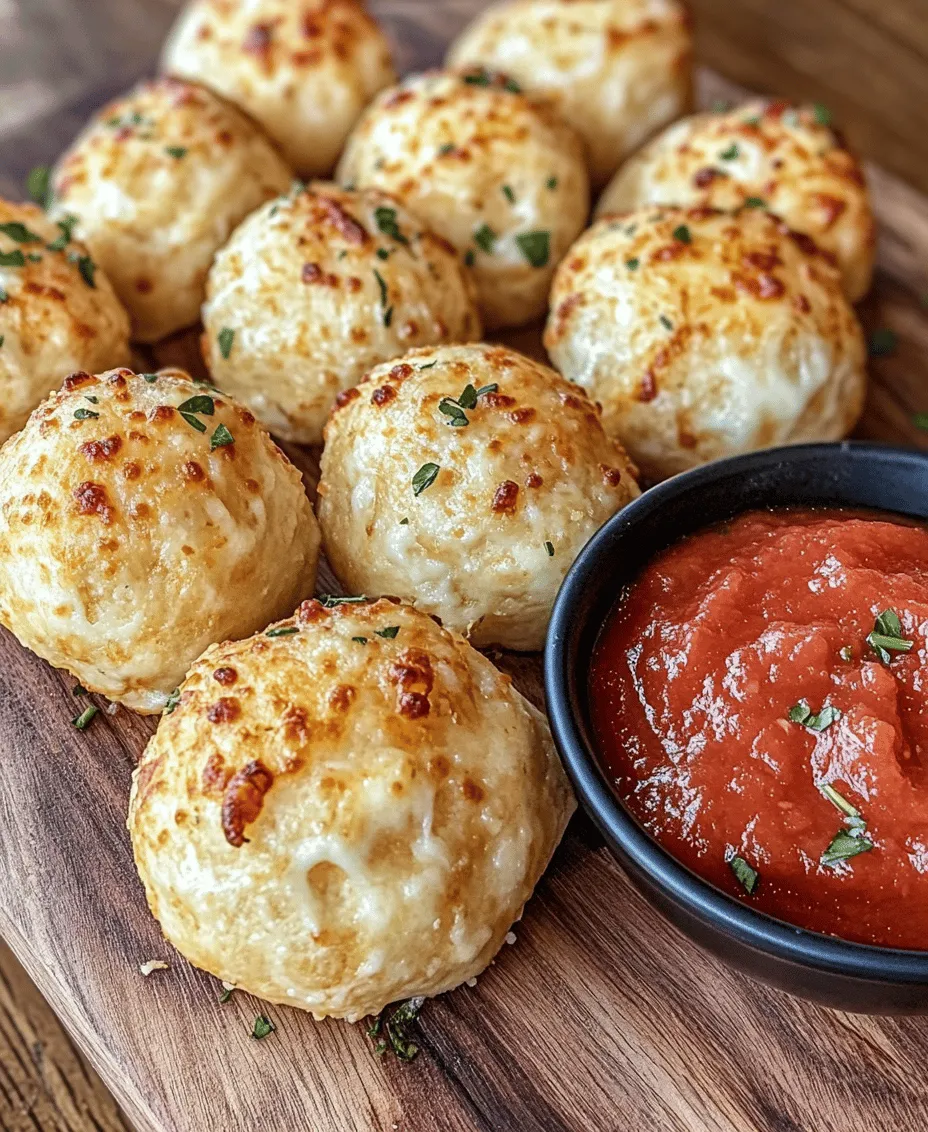
3. Recognizing Doneness: You’ll know your cheesy dough balls are done when they are golden on the outside and sound hollow when tapped. Additionally, the cheese inside should be melted and gooey, creating a delightful surprise when you take your first bite.
Serving Suggestions
Presentation is key when serving your cheesy pizza dough balls. Here are some creative ideas to make your dish stand out:
– Garnish: Serve the dough balls on a large platter, garnished with fresh herbs, such as parsley or basil, for a pop of color.
– Dipping Sauces: While marinara sauce is a classic choice, consider offering a variety of dips to elevate the experience:
– Garlic Butter: Melted butter infused with garlic adds a rich flavor.
– Ranch Dressing: Cool and creamy, ranch dressing pairs wonderfully with the warm, cheesy dough.
– Spicy Aioli: For those who enjoy a kick, a spicy aioli can add depth to the flavor profile.
– Snack Platter: Incorporate these dough balls into a larger snack platter alongside olives, charcuterie, and assorted cheeses. This makes for a fantastic appetizer or party snack that’s sure to impress your guests.
Nutritional Information
Understanding the nutritional content of your cheesy pizza dough balls can help you enjoy them guilt-free. Here’s a breakdown of the nutritional information per serving (assuming 1 dough ball):
– Calories: Approximately 150 calories
– Protein: 5g
– Carbohydrates: 22g
– Fat: 6g
– Fiber: 1g
– Sodium: 220mg
These dough balls offer a balanced mix of carbohydrates for energy, protein for muscle repair, and fats for flavor. When served with a side of marinara sauce, you also get a dose of vitamins from the tomato base, making it a delightful treat that satisfies both taste and nutrition.
Conclusion
Cheesy pizza dough balls with marinara dip are a scrumptious blend of flavors and textures that bring joy to any gathering. With a crispy exterior, gooey cheese center, and a variety of dipping options, they are perfect for parties, game days, or cozy family dinners.
We encourage you to try making this recipe at home, as it not only serves as a fantastic snack but also creates a wonderful opportunity for family and friends to gather around delicious food. By mastering the art of shaping, seasoning, and baking these dough balls, you can turn a simple recipe into a cherished staple in your culinary repertoire. Enjoy the delightful experience of creating and sharing these cheesy dough balls, and watch as they become a favorite among your loved ones.