
Introduction
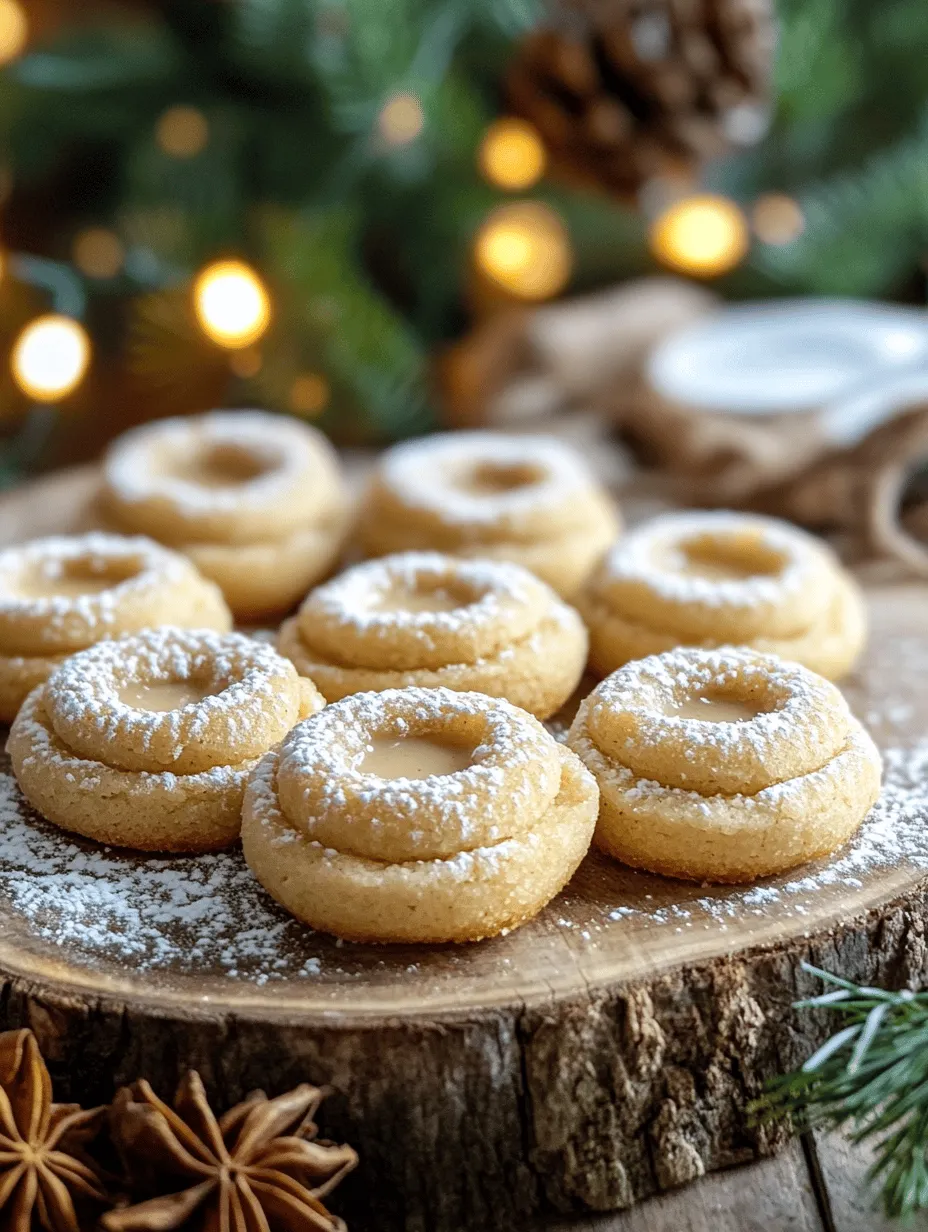
The holiday season is a time for warmth, joy, and delicious baked goods that evoke nostalgia. As families gather to celebrate the festive spirit, the kitchen often becomes a hub of activity filled with the enticing aromas of cinnamon, nutmeg, and sweet treats. One such delightful creation that perfectly captures the essence of the holidays is the Eggnog Thumbprint Cookie. These cookies not only embody the rich flavors of traditional eggnog but also offer a unique texture that makes them a standout during any holiday gathering.
Eggnog, a creamy and spiced beverage typically enjoyed during the winter months, has become synonymous with holiday cheer. Its warm, comforting flavors inspire countless culinary creations, and the Eggnog Thumbprint Cookies are a testament to this festive trend. Imagine biting into a soft, buttery cookie that reveals a velvety center infused with the quintessential flavors of eggnog. Whether you’re hosting a holiday party, exchanging gifts with friends, or simply enjoying a cozy evening at home, these cookies bring warmth and cheer to your celebrations.
The Allure of Eggnog in Holiday Baking
During the holiday season, eggnog reigns supreme as a beloved beverage. Its creamy texture, rich flavor, and hint of spice make it a quintessential part of holiday gatherings. Over the years, eggnog has evolved from its historical origins as a drink enjoyed by the aristocracy in the 17th century to a staple in homes across the globe. Today, it’s hard to imagine the festive season without the sight of eggnog on tables, ready to be sipped by family and friends.
Incorporating eggnog into baked goods, such as cookies, elevates traditional recipes to new heights. The addition of eggnog in cookie recipes enhances the flavor profile, adding a richness and creaminess that is both comforting and indulgent. Not only does eggnog contribute to the taste, but it also adds moisture to the dough, ensuring that each cookie is soft and tender. The warm spices of nutmeg and cinnamon, which are characteristic of eggnog, further enhance the holiday spirit, making these cookies a perfect treat for any festive occasion.
Key Ingredients for Eggnog Thumbprint Cookies
To create the perfect Eggnog Thumbprint Cookies, you’ll need a handful of essential ingredients. Each component plays a crucial role in achieving the delightful balance of flavors and textures that make these cookies so special.
– All-Purpose Flour: The foundation of any cookie, all-purpose flour provides structure and texture. It allows the cookies to hold their shape while remaining tender.
– Baking Powder: This leavening agent is essential for creating a light and airy cookie. It helps the cookies rise during baking, ensuring they have a delicate crumb.
– Nutmeg and Cinnamon: These warm spices are synonymous with holiday baking. Nutmeg adds a sweet, nutty flavor, while cinnamon brings warmth and depth, enhancing the overall taste of the cookies.
– Unsalted Butter: Butter is the key to rich, flavorful cookies. Unsalted butter contributes to the cookies’ tenderness and richness, allowing for a melt-in-your-mouth experience.
– Granulated Sugar and Powdered Sugar: These sugars balance the flavors and provide the necessary sweetness. Granulated sugar helps to create a crisp exterior, while powdered sugar adds a finishing touch of sweetness.
– Egg Yolk: The egg yolk adds richness to the dough and helps to bind the ingredients together, ensuring the cookies have the right texture.
– Vanilla and Rum Extracts: These extracts enhance the flavor profile of the cookies. Vanilla adds a warm sweetness, while rum extract complements the eggnog flavor, providing an extra layer of holiday cheer.
– Eggnog: The star ingredient, eggnog, is what makes these cookies truly special. It infuses the dough with its unique flavor and moisture, resulting in a cookie that captures the essence of the classic holiday drink.
Step-by-Step Instructions for Perfect Cookies
Creating Eggnog Thumbprint Cookies is a straightforward process that can be enjoyed by bakers of all skill levels. Follow these detailed steps to ensure your cookies turn out perfectly every time.
Preheating the Oven
Before you begin mixing your ingredients, it’s essential to preheat your oven to 350°F (175°C). This step is crucial for baking, as it ensures the cookies bake evenly and achieve the desired texture. An adequately preheated oven will create the perfect environment for the cookies to rise and develop a lovely golden color.
Combining Dry Ingredients
Begin by preparing your dry ingredients. In a medium-sized bowl, sift together the all-purpose flour, baking powder, nutmeg, and cinnamon. Sifting not only helps break up any lumps in the flour but also ensures that the dry ingredients are well combined. This step is vital, as it contributes to the overall texture of the cookies. The even distribution of baking powder and spices will prevent any clumping during the mixing process, resulting in a uniform flavor throughout the batch.
Carefully measure out each ingredient to ensure accuracy. The right balance of flour and leavening agents is key to achieving the soft, tender texture that is characteristic of thumbprint cookies. Once sifted, set the bowl aside, as you’ll incorporate these dry ingredients into the wet mixture shortly.
Preparing the Wet Ingredients
While the dry ingredients are resting, take a large mixing bowl and cream together the unsalted butter and granulated sugar. Using an electric mixer or a sturdy wooden spoon, beat the mixture until it becomes light and fluffy. This process usually takes about 2-3 minutes and is essential for incorporating air into the dough, which contributes to the cookie’s light texture.
Once the butter and sugar are well combined, add the egg yolk, vanilla extract, and rum extract to the mixture. Continue to mix until the wet ingredients are fully incorporated. The combination of these ingredients not only enhances the flavor profile but also adds richness to the cookies.
Next, it’s time to pour in the eggnog. Gradually add the eggnog to the butter and sugar mixture, mixing until everything is well combined. The eggnog will lend a delightful creaminess to the dough, making it soft and easy to work with.
Incorporating Dry Ingredients into Wet Mixture
Now that you have both your wet and dry mixtures prepared, it’s time to bring them together. Gradually add the dry ingredient mixture to the wet ingredients, mixing on low speed or gently folding with a spatula. Be careful not to overmix, as this can lead to tough cookies. The goal is to combine the ingredients until just incorporated; a few lumps are perfectly fine.
Once combined, you’ll have a soft and slightly sticky dough that is ready for shaping. At this point, you can cover the bowl with plastic wrap or a clean kitchen towel and let the dough rest for about 15 minutes. This resting period allows the flavors to meld and the dough to firm up slightly, making it easier to handle when forming the cookies.
Shaping the Cookies
After the dough has rested, it’s time to shape your cookies. Prepare a baking sheet lined with parchment paper to prevent sticking. Using a tablespoon or cookie scoop, portion out the dough and roll it into small balls, about one inch in diameter. Place the dough balls onto the prepared baking sheet, leaving enough space between each cookie to allow for spreading during baking.
Once all the dough is portioned, it’s time to create the thumbprint indentation. Using your thumb or the back of a measuring spoon, gently press down the center of each cookie ball to create a small well. This indentation will hold the delicious filling that will be added after baking.
The next steps of the baking process will involve a few more details to ensure the perfect finish for your Eggnog Thumbprint Cookies. Stay tuned as we dive deeper into the baking process and how to add that final touch to make these cookies a holiday favorite.
Creaming Butter and Sugar
The first pivotal step in crafting your Eggnog Thumbprint Cookies involves creaming together the butter and sugar. This method is not merely a formality; it plays a significant role in determining the texture and overall structure of your cookies. When you cream the butter until it is light and fluffy, you are incorporating air into the mixture. This process creates a lighter texture, which helps your cookies rise beautifully while baking.
To achieve the perfect cream, ensure that your butter is at room temperature. It should be soft enough to easily blend with the sugar but not melted. Use an electric mixer on medium speed for about 2 to 3 minutes, or until the mixture appears pale and fluffy. The sugar granules should dissolve into the butter, creating an airy base that will support the other ingredients in your dough.
Incorporating Eggs and Extracts
Next, it’s time to add the eggs and extracts. This step is crucial as it not only contributes to the moisture of the dough but also enhances its flavor profile. For Eggnog Thumbprint Cookies, using a blend of vanilla extract and a touch of nutmeg extract will evoke that classic eggnog flavor, making your cookies taste festive and rich.
When adding the eggs, ensure they are also at room temperature. This helps the eggs integrate more seamlessly, creating a smooth batter. Mix the eggs in one at a time, ensuring they are fully incorporated before adding the next. This gradual incorporation of wet ingredients helps achieve a balanced flavor while maintaining the light and fluffy texture established in the creaming step.
Mixing Dry Ingredients with Wet
Now that your wet ingredients are prepared, it’s time to incorporate the dry ingredients. This step is essential for achieving the right dough consistency. In a separate bowl, whisk together your flour, baking powder, and a pinch of salt. The baking powder will act as the leavening agent, giving your cookies that desirable softness.
Gradually add the dry mixture to the wet ingredients, mixing on low speed until just combined. Be careful not to overmix, as this can lead to tough cookies. The goal is to achieve a soft, slightly sticky dough that holds together well but isn’t too wet. If you find your dough is too sticky, a light dusting of flour on your hands while shaping can help.
Shaping Cookies
Once your dough is ready, it’s time to shape the cookies. Use a cookie scoop or a tablespoon to portion out the dough. For uniformity, ensure each scoop is roughly the same size. This will help the cookies bake evenly and present nicely.
When placing the dough balls on your baking sheet, leave enough space between them—about 2 inches apart. This spacing allows the cookies to spread without merging into one another while baking, ensuring they maintain their distinct shape.
Creating Thumbprints
The signature feature of your Eggnog Thumbprint Cookies is, of course, the thumbprint itself. Once shaped, take your thumb or the back of a teaspoon to create a small indentation in each dough ball. This thumbprint is not just for aesthetics; it serves a purpose by holding the filling that enhances the cookie’s flavor.
For a creative twist, consider using the back of various utensils, such as a measuring spoon or a small cookie cutter, to create different shapes in the dough. You can also experiment with different fillings—think of a spiced eggnog cream or even a drizzle of warm caramel.
Baking and Cooling
Baking your cookies is where the magic truly happens. Preheat your oven to 350°F (175°C) and line your baking sheet with parchment paper. Bake the cookies for 10 to 12 minutes, or until the edges are lightly golden.
An important tip is to rotate your baking sheet halfway through the baking time to ensure even cooking, especially if your oven has hot spots. Once baked, allow the cookies to cool on the baking sheet for a few minutes before transferring them to a wire rack. This cooling process is vital for helping the cookies set properly without falling apart.
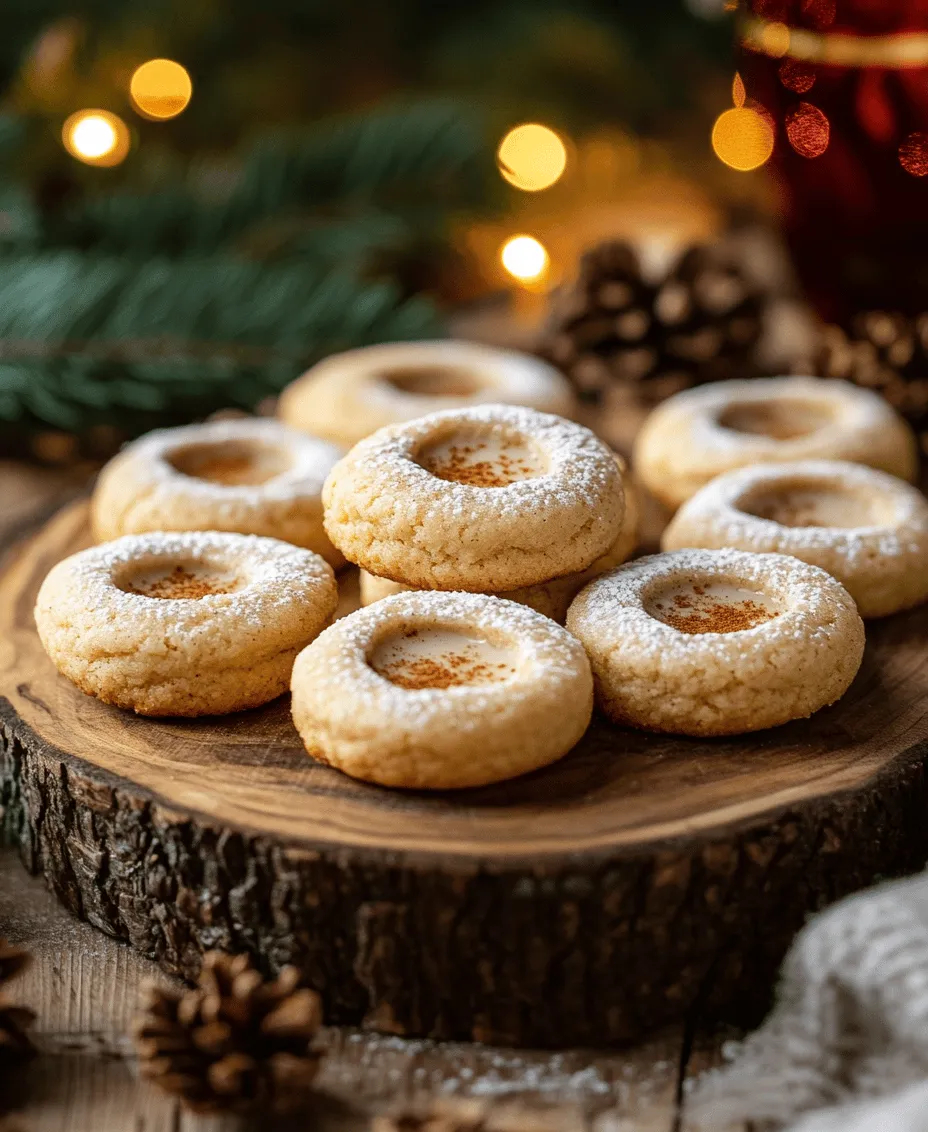
Finishing Touch with Powdered Sugar
For the finishing touch, dust your cooled cookies with powdered sugar. This not only enhances the visual appeal of your Eggnog Thumbprint Cookies but also adds a subtle sweetness that balances out the spiced flavors. Use a fine mesh sieve to sprinkle the powdered sugar evenly over the cookies, ensuring a delicate and airy finish.
Serving Suggestions and Pairings
Eggnog Thumbprint Cookies are perfect for sharing and can be enjoyed in various ways. They make a delightful addition to any holiday cookie platter, bringing a festive flair to your gatherings. Pair these cookies with a warm cup of coffee, a soothing tea, or even a glass of eggnog for a complete holiday experience.
Consider serving them during family get-togethers, office parties, or casual holiday nights with friends. They also make an excellent gift—simply package them in a decorative tin or box to share the joy of your baking with loved ones.
Nutritional Information and Dietary Considerations
While Eggnog Thumbprint Cookies are a delicious treat, it’s essential to be mindful of their nutritional content. Each cookie typically contains around 120 calories, depending on the size and ingredients used. They have a moderate amount of sugar and fat, primarily from the butter and sugar content.
For those with dietary restrictions, there are several substitutions you can make without compromising the integrity of the recipe. Gluten-free flour blends can be used in place of all-purpose flour to cater to gluten sensitivities. Additionally, for a dairy-free option, consider using plant-based butter or coconut oil. These substitutions maintain the cookie’s flavor while accommodating various dietary needs.
The Joy of Holiday Baking with Family
Baking during the holidays is more than just a culinary task; it’s a cherished tradition that fosters connection and joy among family and friends. The act of measuring, mixing, and decorating cookies creates lasting memories and brings people together.
Consider involving children or friends in the baking process. Their excitement and creativity add an extra layer of fun to the experience. Sharing anecdotes about past baking adventures or decorating cookies together can lead to laughter and bonding, making the holiday season even more special.
Conclusion
Eggnog Thumbprint Cookies epitomize the warmth and cheer of holiday celebrations. Their delightful flavors, combined with a simple yet engaging baking process, make them a must-try for anyone looking to embrace the spirit of the season.
This recipe is not only easy to follow but also opens the door to creativity, inviting bakers of all skill levels to create something special. As you gather with loved ones this holiday season, consider baking these cookies to foster connection and joy through the art of baking. Share them, savor them, and cherish the moments spent together—every bite is a reminder of the warmth and love that the holiday season brings.