
Introduction
Oreo Dream Delight is a no-bake dessert that tantalizes the taste buds with its rich and creamy layers, making it the perfect indulgence for any occasion. Whether you’re hosting a family gathering, celebrating a birthday, or simply treating yourself, this dessert provides a delightful escape into a world of flavor and texture. With its combination of chocolatey Oreos, luscious cream cheese, and creamy pudding, it’s no wonder that Oreo Dream Delight has become a favorite among dessert lovers.
The appeal of easy-to-make desserts cannot be overstated, especially for those who may not have extensive baking skills or time to spend in the kitchen. This recipe eliminates the need for baking, allowing you to whip up a delicious treat in no time at all. The best part? You can prepare it ahead of time, freeing you to enjoy more moments with friends and family without the stress of last-minute dessert preparations.
What sets this dessert apart is its perfect balance of flavors and textures. The rich creaminess of the cream cheese layer melds beautifully with the crunch of the Oreo crust, while the smooth pudding layer adds a luxurious finish. Each bite of Oreo Dream Delight offers a delightful contrast that keeps you coming back for more.
Understanding the Ingredients
To create the heavenly layers of Oreo Dream Delight, it’s essential to understand the key ingredients that make this dessert so special. The primary components are Oreos, cream cheese, and instant pudding mix, each playing a vital role in delivering the dream-like experience that this dessert promises.
1. Oreos: The iconic chocolate sandwich cookies serve as the foundation of this dessert. When crushed, Oreos transform into a crumbly yet sturdy crust that adds a satisfying crunch. Their rich chocolate flavor complements the creamy layers above, creating a harmonious blend of taste.
2. Cream Cheese: This ingredient is critical for achieving the dessert’s signature creaminess. Softened cream cheese provides a smooth base for the filling, enhancing the overall texture of the dish. It offers a slight tang that balances the sweetness of the dessert, preventing it from becoming overly rich.
3. Instant Pudding Mix: The pudding layer adds an essential creaminess and flavor depth. Instant vanilla pudding mix is used for its convenience, requiring just milk for preparation. Once set, it forms a velvety layer that complements the other ingredients beautifully.
4. Optional Ingredients: For those looking to add a personal touch, consider incorporating mini chocolate chips or crushed Oreos into the cream cheese or pudding layers. These additions not only enhance the flavor but also add visual appeal, creating a dessert that looks as good as it tastes.
Understanding these ingredients will set the stage for mastering the Oreo Dream Delight. Now that we have an overview of the components, let’s dive into the first steps of preparing this delightful dessert.
Preparing the Oreo Crust
Creating the perfect crust is essential for the overall structure and success of your Oreo Dream Delight. A sturdy crust not only supports the layers above but also adds a delightful crunch that enhances each bite. Here’s how to prepare the Oreo crust step-by-step.
Step 1: Gather Your Ingredients
For the crust, you will need:
– 24 Oreo cookies
– 1/2 cup unsalted butter, melted
Step 2: Crush the Oreos
The first step in making the crust is to crush the Oreo cookies into fine crumbs. Using a food processor is the most efficient way to achieve this. Simply place the whole Oreos (no need to remove the cream filling) into the food processor and pulse until you have a fine crumb consistency. If you don’t have a food processor, you can place the Oreos in a zip-top bag and crush them with a rolling pin or heavy object.
Step 3: Combine with Butter
Once you have your fine Oreo crumbs, transfer them to a mixing bowl and add the melted unsalted butter. The butter acts as a binding agent, ensuring that the crust holds together once set. Stir the mixture until all the crumbs are evenly coated with butter.
Step 4: Press into the Baking Dish
Next, prepare a 9×13 inch baking dish by lightly greasing it with cooking spray or lining it with parchment paper for easy removal. Pour the Oreo crumb mixture into the dish and use the back of a measuring cup or your hands to press the crumbs evenly into the bottom of the dish. Make sure to press firmly to create a compact crust that can withstand the layers above.
Step 5: Chill the Crust
Once the crust is pressed down evenly, place the baking dish in the refrigerator for about 15 to 20 minutes. Chilling the crust helps it set and firm up, making it easier to layer the cream cheese filling on top. A sturdy crust is crucial in ensuring that your dessert maintains its shape when served.
Creating the Cream Cheese Layer
With the crust set, it’s time to prepare the creamy filling that will elevate your Oreo Dream Delight. The cream cheese layer is rich, smooth, and incredibly easy to make. Here’s how to prepare it in detail.
Step 1: Gather Your Ingredients
For the cream cheese layer, you will need:
– 8 ounces cream cheese, softened
– 1 cup powdered sugar
– 1 teaspoon vanilla extract
– 1 container (8 ounces) whipped topping, thawed
Step 2: Soften the Cream Cheese
To ensure a smooth and lump-free mixture, start with softened cream cheese. It’s best to let it sit at room temperature for about 30 minutes before mixing. If you’re short on time, you can microwave it for about 10-15 seconds, but be careful not to melt it.
Step 3: Mix Cream Cheese and Sugar
In a large mixing bowl, combine the softened cream cheese, powdered sugar, and vanilla extract. Using an electric mixer, beat the mixture on medium speed until it is smooth and creamy. The powdered sugar not only adds sweetness but also helps achieve a light and fluffy texture.
Step 4: Fold in Whipped Topping
Once the cream cheese mixture is well combined, gently fold in the thawed whipped topping. Use a spatula to carefully mix the two together, being cautious not to deflate the whipped topping. This step is crucial for achieving the light, airy texture that characterizes the cream cheese layer.
Step 5: Spread Over the Crust
Once fully combined, take the cream cheese mixture and spread it evenly over the chilled Oreo crust. Use a spatula to smooth the top, ensuring that it reaches the edges of the dish. This layer should be thick and creamy, providing a beautiful contrast to the crust beneath.
Making the Pudding Layer
The final layer of the Oreo Dream Delight is the pudding layer, which adds a luscious and creamy element to the dessert. Here’s how to prepare it step-by-step.
Step 1: Gather Your Ingredients
For the pudding layer, you will need:
– 2 cups cold milk
– 1 package (3.4 ounces) instant vanilla pudding mix
Step 2: Combine Pudding Mix and Milk
In a medium-sized mixing bowl, combine the instant vanilla pudding mix with the cold milk. Whisk the mixture together until the pudding begins to thicken, which should only take about 2 minutes. The instant pudding mix is designed to set quickly, making it a convenient choice for this no-bake dessert.
Step 3: Spread Over Cream Cheese Layer
Once the pudding has thickened to a creamy consistency, carefully pour it over the cream cheese layer. Use a spatula to spread it evenly, ensuring that it covers the entire surface without disturbing the cream cheese layer beneath.
Step 4: Chill
After adding the pudding layer, cover the baking dish with plastic wrap or aluminum foil and place it back into the refrigerator. Allow it to chill for at least 4 hours, or overnight for the best results. Chilling is essential for the layers to set properly and for the flavors to meld together beautifully.
By following these steps, you will create a stunning Oreo Dream Delight that is sure to impress anyone lucky enough to indulge in it. The combination of flavors and textures will leave a lasting impression, making it a dessert you’ll want to recreate time and time again. In the next part of this article, we will explore additional tips for achieving the best results and answer some common questions related to this delightful treat.
The Science of Mixing Milk and Pudding Mix
Achieving the perfect consistency for your Oreo Dream Delight begins with understanding the science behind mixing milk and pudding mix. The key to a smooth, creamy texture lies in the ratio of milk to pudding mix. Typically, a standard box of instant pudding mix requires two cups of cold milk. When you whisk these two ingredients together, the milk proteins and starches in the pudding interact, thickening the mixture as it hydrates. The goal is to whisk until the mixture is well-combined and free of lumps. This step ensures that your pudding layer will set properly and create a delightful creamy layer within your dessert.
For those who prefer a thicker pudding layer, consider using slightly less milk. Reducing the amount of milk to 1¾ cups can yield a denser consistency, which can complement the lighter whipped topping layers beautifully. Whisk vigorously for about two minutes, then allow the mixture to sit for a few minutes to thicken even more before incorporating it into your dessert. This resting time is crucial because it allows the pudding to fully activate, resulting in a luscious layer that contrasts wonderfully with the other textures in the Oreo Dream Delight.
Importance of Letting the Mixture Firm Up Before Assembly
Before diving into the assembly of your Oreo Dream Delight, it’s vital to let the pudding mixture firm up. If you skip this step, you may end up with a runny pudding layer that doesn’t hold its shape when layered with the other ingredients. After whisking the pudding and milk together, let it sit for at least 5 minutes. This resting period allows the pudding to thicken and ensures that it sets properly when layered with the cream cheese and whipped topping.
Assembling the Layers
Now that your pudding has thickened and is ready for assembly, it’s time to create the delightful layers that make up the Oreo Dream Delight. Follow these detailed instructions for assembling your dessert:
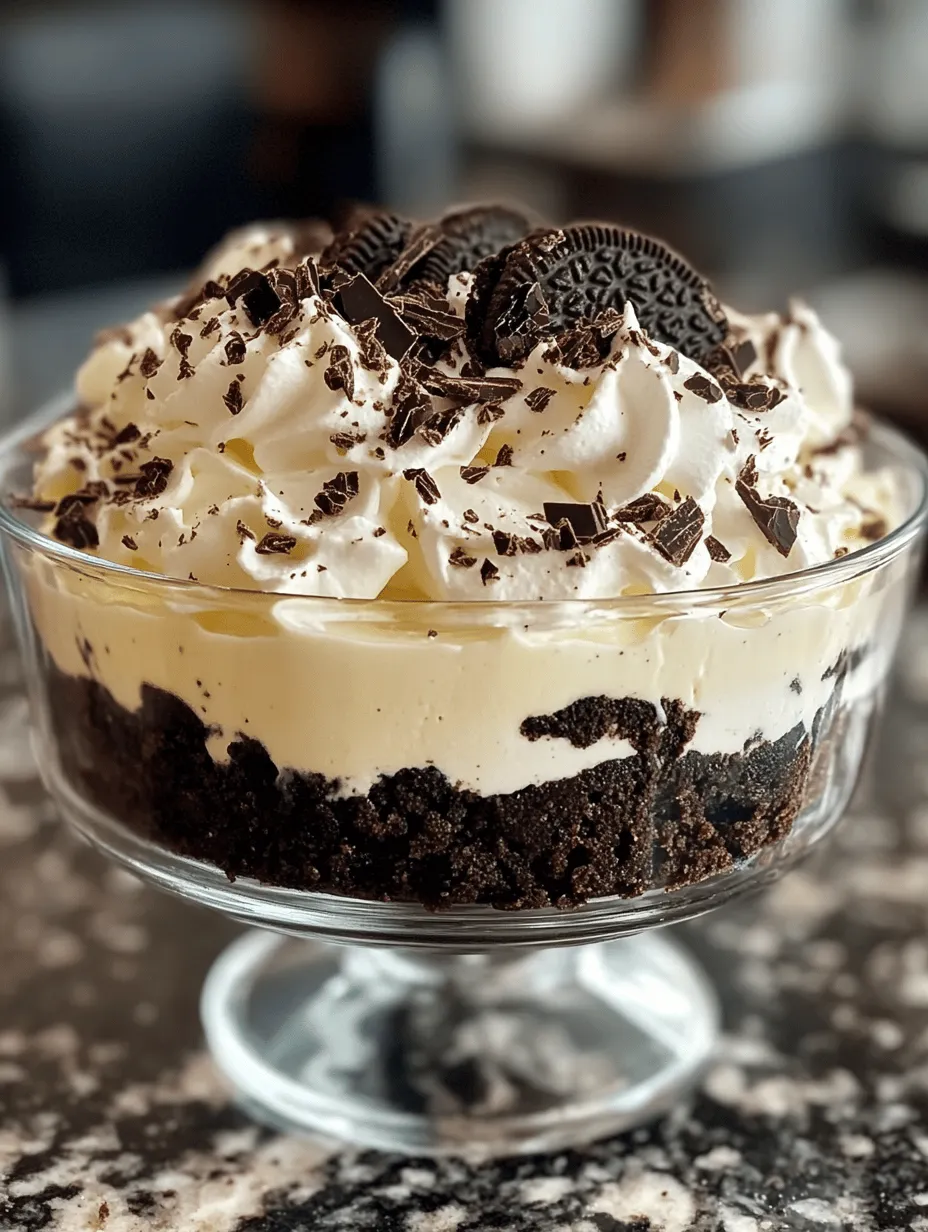
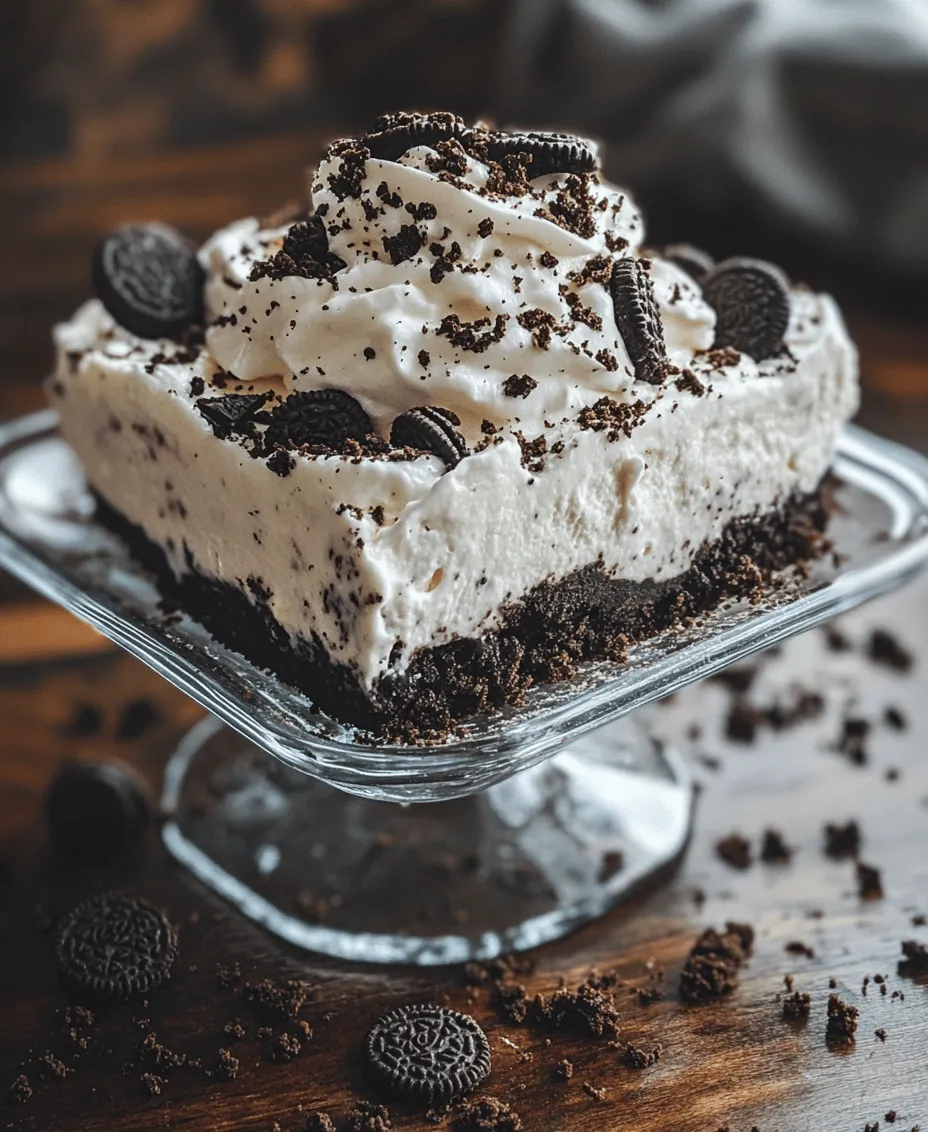
1. Prepare Your Dish: Start with a 9×13-inch baking dish or a trifle bowl for a beautiful presentation. Ensure it’s clean and dry to avoid any unwanted mixing of flavors.
2. First Layer – Crushed Oreos: Begin by layering half of the crushed Oreos evenly across the bottom of the dish. Use a flat-bottomed glass or measuring cup to press them down slightly, creating a solid base for your dessert.
3. Second Layer – Cream Cheese Mixture: In a separate bowl, blend together softened cream cheese, sugar, and a portion of the whipped topping until smooth. Spread half of this mixture evenly over the crushed Oreos. Be sure to spread it gently to avoid mixing it with the cookie layer below.
4. Third Layer – Pudding: Next, pour half of your prepared pudding mixture over the cream cheese layer. Use a spatula to spread it evenly, ensuring that it reaches the edges of the dish for a polished look.
5. Repeat The Layers: Follow the same pattern for the next layers—another round of crushed Oreos, the remaining cream cheese mixture, and then the rest of the pudding.
6. Final Layer – Whipped Topping: Finish off with a final layer of whipped topping spread evenly across the top. This layer not only adds a creamy finish but also acts as a canvas for your garnishes.
Tips for Spreading Each Layer Evenly for Visual Appeal
To achieve a visually appealing dessert, it’s crucial to spread each layer evenly. Here are some tips to help you with this:
– Use an Offset Spatula: This tool is perfect for spreading mixtures evenly without disrupting the underlying layers.
– Take Your Time: Patience is key. Spend a little extra time ensuring each layer is smooth and reaches the edges of the dish. This will enhance the overall presentation when served.
– Consider Adding Mini Chocolate Chips: For added texture and a delightful surprise, you can sprinkle mini chocolate chips between layers or on top of the whipped topping. This not only adds visual interest but also a burst of chocolate flavor with every bite.
Finishing Touches
Once you’ve layered your Oreo Dream Delight, it’s time to add the finishing touches that elevate its presentation:
1. Final Layer of Whipped Topping: After you’ve added the last layer of whipped topping, you can create decorative swirls using a spatula or the back of a spoon. This adds a professional touch to your dessert.
2. Garnishing Options: Consider garnishing the top with crushed Oreos or shaved chocolate for an inviting look. Using a microplane or vegetable peeler, create delicate chocolate shavings that will elegantly contrast with the white whipped topping.
3. Presentation Matters: Never underestimate the importance of presentation. A well-garnished dessert not only looks appealing but also enhances the dining experience. Use a clean spatula or knife to smooth the edges of the dessert for a polished finish.
Chilling and Serving the Dessert
Chilling your Oreo Dream Delight is essential for achieving the best flavor and texture. After assembling, cover the dish with plastic wrap or a lid and refrigerate it for at least 4-6 hours. This chilling time allows the layers to meld together, and the pudding to set properly, creating that creamy, dreamy texture you expect from this dessert.
Recommended Chilling Time for Optimal Results
While you might be tempted to dig in right after assembly, allowing the dessert to chill overnight yields the best results. The flavors deepen, and the layers firm up, making for easier slicing and serving.
Tips on Slicing and Serving for Visual Appeal
When it’s time to serve your Oreo Dream Delight, here are some tips to ensure it looks as good as it tastes:
– Use a Sharp Knife: A sharp knife will help you cut clean slices without disrupting the layers. Dip the knife in warm water between cuts for even smoother slices.
– Serve in Individual Portions: For a more elegant presentation, consider serving the dessert in individual cups or jars. This not only enhances the visual appeal but also makes it easier for guests to enjoy.
Nutritional Information
One serving of Oreo Dream Delight (approximately 1/12 of the recipe) contains around 300 calories, along with 20 grams of fat, 31 grams of carbohydrates, and 4 grams of protein. Keep in mind that these values may vary slightly depending on the specific brands of ingredients used.
Dietary Considerations
If you’re looking to accommodate dietary preferences, consider these alternatives:
– Gluten-Free Options: Use gluten-free Oreos to make this dessert accessible for those with gluten sensitivities.
– Low-Sugar Alternatives: Opt for sugar-free pudding mix and low-sugar whipped topping to create a lighter version of this dessert without sacrificing flavor.
Conclusion
In summary, the Oreo Dream Delight is not only easy to make but also a delicious crowd-pleaser perfect for any occasion. With its layers of creamy pudding, whipped topping, and crunchy Oreos, this dessert is sure to impress your family and friends. Whether you’re celebrating a special occasion or simply enjoying a casual gathering, this dessert will be the highlight of your table.
We encourage you to try your hand at this delightful recipe. Homemade desserts bring a unique joy that store-bought treats simply cannot match. Sharing your culinary creations with loved ones is a wonderful way to create lasting memories. So gather your ingredients, follow the steps, and enjoy the sweet satisfaction of serving your very own Oreo Dream Delight!